I am getting married in 8 days! I know they tell you that you should stay away from DIY projects because they bring on unnecessary stress, but I couldn't help myself with this one.
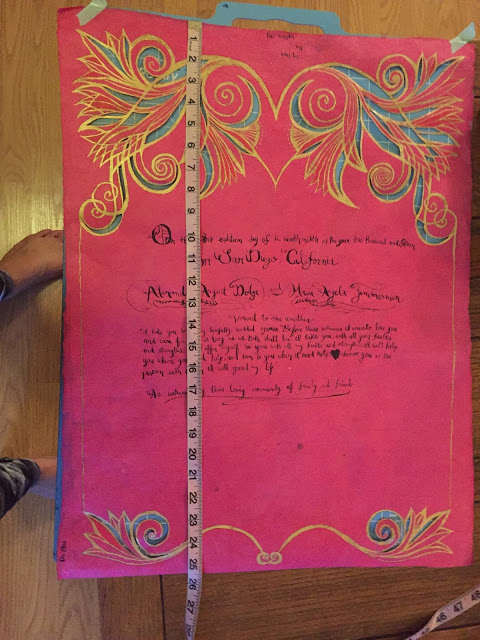
The item you see below is 19x25" and will be placed at the entrance of our reception. All our guests will sign it and we will get to remember this fact when gazing upon the wall hanging for the rest of our lives. Its a beautiful piece of art and a lovely way
Despite having to learn many new tricks to put this together, I am pretty happy with the way it turned out. Sure, I could have informed my paper choices a little better, measured twice cut once, and fit in a few hundred more hours worth of calligraphy tutorials, but all things considered, it doesn't look half bad.
Tutorial and tribulations after the Jump
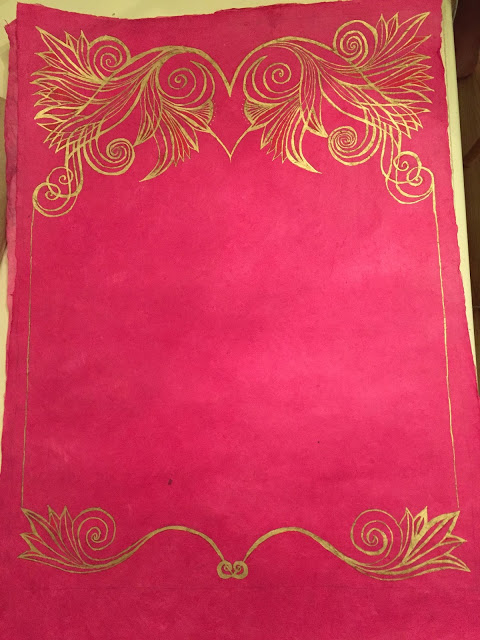
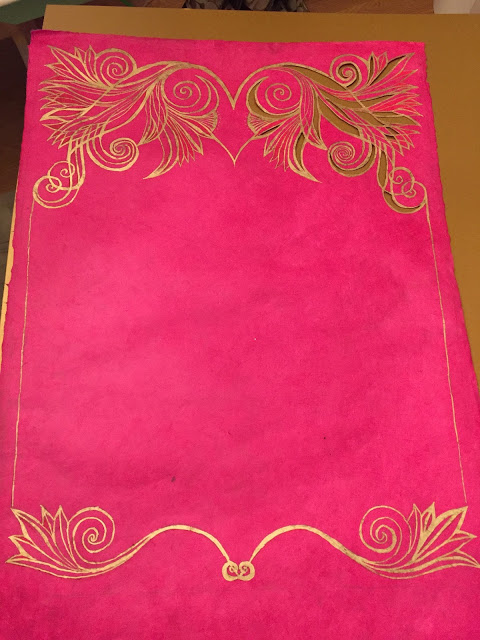
So I didn't freehand this. I projected and traced the neat outside part. This part took around 1 hour. The worst part about this task was boiling under the hot projection light.
 This is what it looked like right after the paint penning. At this point I realized that it might actually be quite beautiful.
 After I felt like I had enough practice, I started the tedious task of blocking. I used a piece of paper and meticulously measured and repeated in order to ensure that I could maintain the same gauge over and over again. This is the way they teach you to block words in calligraphy books. It turned out that no matter how much practice this portion took, it would not be enough. I still managed to make a poor blocking choice on the real part.
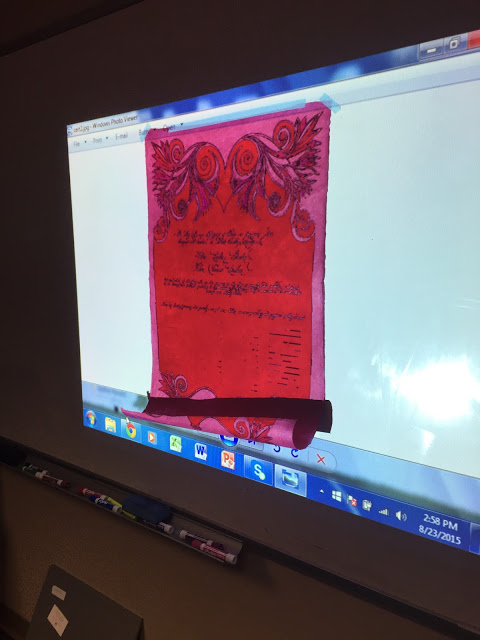
 I panicked at this stage. It is uneven! Also notice that I made a mistake and had to fix it with a big black heart. I managed to patch this in later on, but i was ready to throw the whole thing out the window at this point.
 At this stage I was ready to mount it to the gold backing board. I measured it just to make sure.
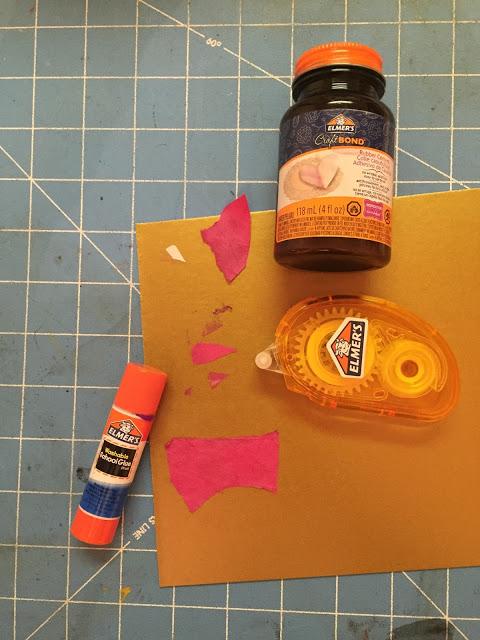
 At this stage I started realizing I had NO plan on how to affix it to the back board. I tested 3 gluing solutions: rubber cement, a tape line dispenser, and glue stick. The rubber cement turned out to be completely temproary with this type of paper. The tape line was so permanent that I wouldn't be able to pull up the board if I made even the slightest adjustment mistake. So much to my surprise, I ended up going with glue stick.
 I decided to just go for it without dwelling too hard about it. I affixed it and never looked back.
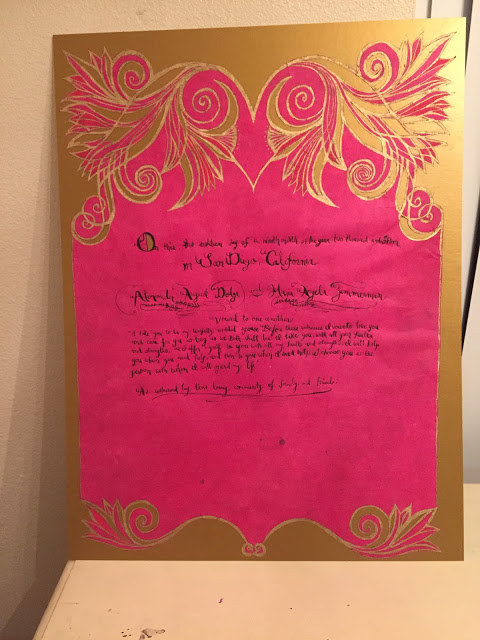 I definitely have things I want to try if I want to do this again. I think I would be wiser with my knifing and more confident with my calligraphy.
Overall, I am quite pleased. I hope everyone will get to sign it on the day of.
Maria
The item you see below is 19x25" and will be placed at the entrance of our reception. All our guests will sign it and we will get to remember this fact when gazing upon the wall hanging for the rest of our lives. Its a beautiful piece of art and a lovely way
Despite having to learn many new tricks to put this together, I am pretty happy with the way it turned out. Sure, I could have informed my paper choices a little better, measured twice cut once, and fit in a few hundred more hours worth of calligraphy tutorials, but all things considered, it doesn't look half bad.

Tutorial and tribulations after the Jump
So I didn't freehand this. I projected and traced the neat outside part. This part took around 1 hour. The worst part about this task was boiling under the hot projection light.
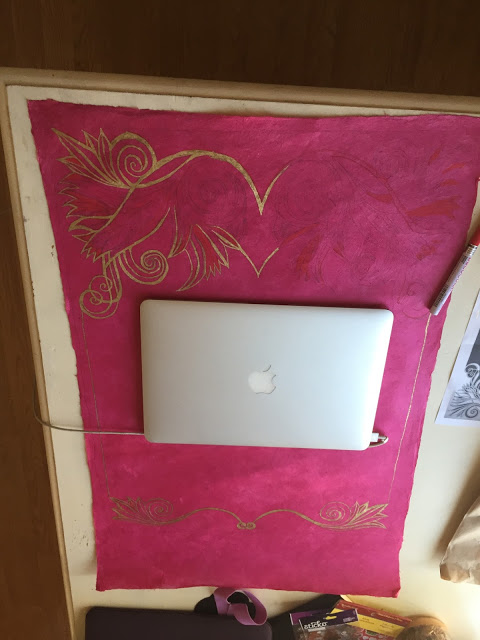
Then I went over my pencil tracings with a gold paint pen. This part was stressful because the projection wasn't perfect, and this was the first opportunity I had to really resolve the lines. I am actually surprised it came out as symmetrical as it did.
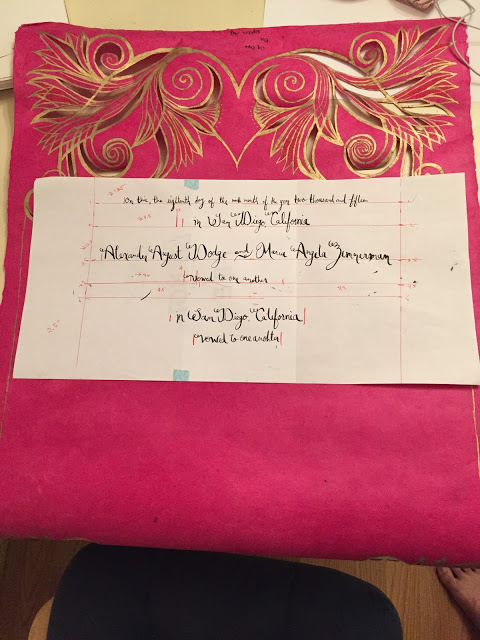
Then I took a hobby knife and started cutting out the negative petal areas. This part was a little worrisome, and in retrospect, I should have done this portion after the calligraphy. The knifed out sections were quite fragile afterwards, and the torque on the paper might of affected the paper quality at the joints.
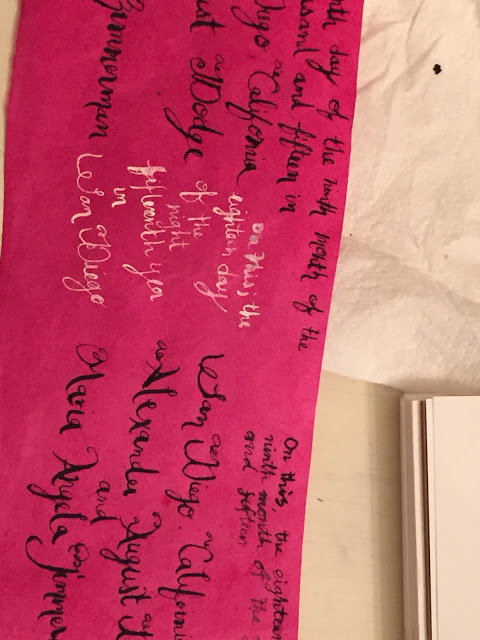
Then came the part that I was procrastinating, the calligraphy. The calligraphy could easily look terrible, and I needed a lot of practice. I was also unsure about whether or not I should use white or black ink. To this day, I don't know if I made the right choice.
Overall, I am quite pleased. I hope everyone will get to sign it on the day of.
Maria

